Organic, Beautiful, and One-of-a-Kind
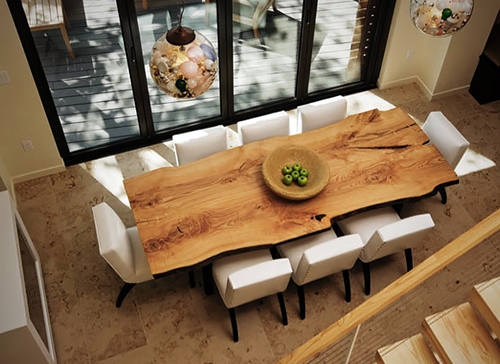
Live edge wood slabs are a one-of-a-kind accessory that can add visual and textural interest to almost any home décor – modern, contemporary, or traditional. Go from rustic to refined with coffee tables, benches, or kitchen and bath counters handcrafted from natural hardwoods like curly maple, black walnut, majestic redwood, or exotic myrtle. Bring your innovative interior design ideas to life using organic shapes, rich grains, and unique patterns inherent in live edge hardwoods.

How to Use Live Edge Wood Slabs
The best ways to use live edge wood slabs in the home or office include handcrafted accessories like tables, countertops, shelves, and seating. Because of their unique texture, slabs can be used as accents to compliment larger furnishings. In the living room, a redwood burl coffee table adds an intriguing focal point to a room full of upholstered sofas and chairs. Turn a kitchen from boring to beautiful with a single salvaged live edge slab polished to perfection for decades of practical use.
While nearly everyone opts for granite, your organic countertops will be the topic of dinnertime conversation. Casual living spaces like family rooms, dens, and playrooms provide the perfect backdrop for live edge benches, stools, and shelves. Used sparingly, natural hardwoods with fluid edges help soften hard spaces and warmly welcome family and friends. In the bedroom, natural woods make a fashion statement with a headboard crafted from a single slab of walnut burl or reclaimed California redwood.
How to Work with Wood Slabs

To transform reclaimed or salvaged slabs into a work of art, start by selecting materials with a beautiful grain. If you wet the surface of a piece of hardwood, you can see the grain and imagine how the piece can best be used. Check to make sure your slab is not infested with insects. If termites are in the wood, you will see a series of small irregular holes where the vermin have bored their way through the flesh of the wood, or there might be signs of wood rot or mold. Below are a few key moments to consider while working on your project.
Choose the Right Thickness
The thickness of your slab will dictate how it should be used. Tables and countertops should be 3 to 4 inches thick, but shelving can be as thin as 1 to 2 inches. Our team prefers thick slabs because they look more natural. Unless you have a woodworking shop, have your local lumber yard or home improvement store cut the plank into a slab.
Strive for the Perfect Finish
The goal of finishing should be to preserve the grain and retain the live edge while removing imperfections like voids, knots, and uneven surfaces that can cause splinters or collect dirt. An electric or pneumatic hand sander quickly removes high and low spots, slubs, or voids. Fill deep holes or crevices with wood filler or putty colored to blend with the finish. Sand the raw plank until you can run your hand smoothly over the surface. Vacuum excess dust using a hand vac across the wood grain.

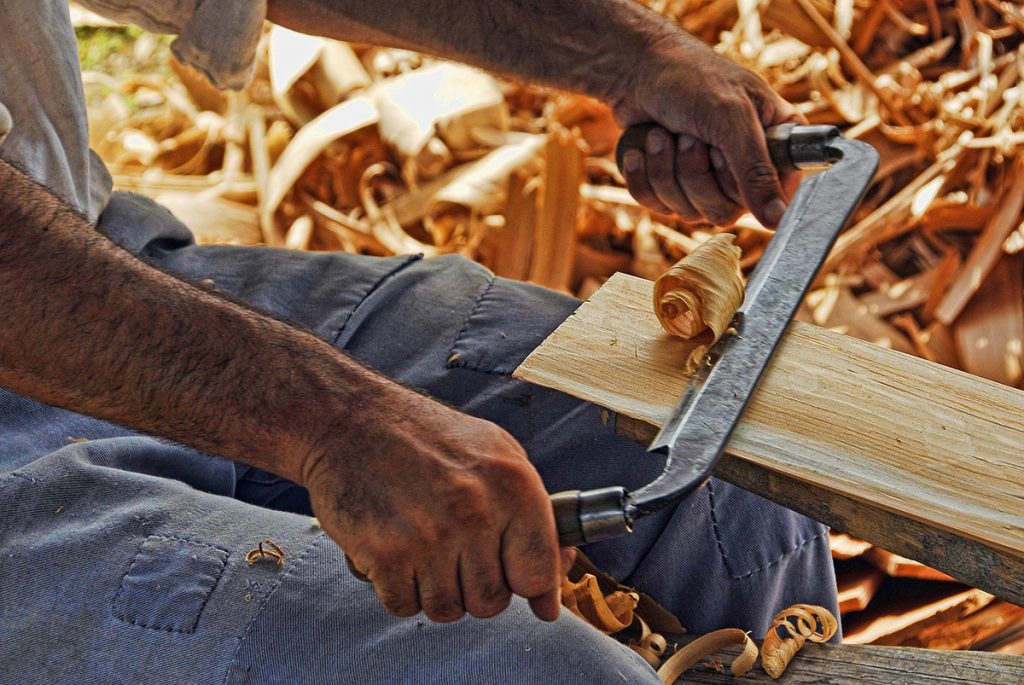
While some may prefer to leave the bark on the live edge wood slabs, many woodworkers have found that bark eventually falls off. For that reason, you want to remove the bark and use heavy grit sandpaper or router to smooth the cracks and crevices of the live edge – again so that your hand easily glides over the top without snags and splinters. Most slabs require finishing with 100-150-grit sandpaper or up to 600-grit for finer finishes.
Buff Up the Beauty
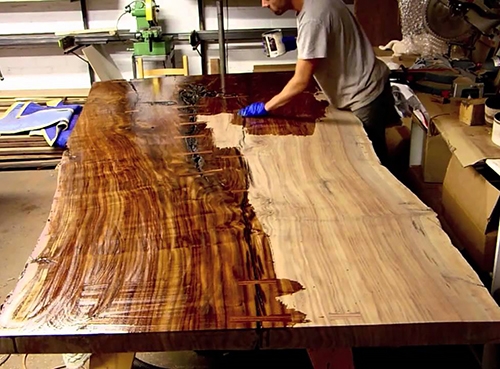
After sanding, one or two coats of oil or wax help to bring out the grain of hardwoods and burls. Hardwood slabs have a linear grain, but burled wood cut crosswise yields an intricate pattern that’s beautiful and unique. Wood oils and butter rubbed into the substrate also help preserve the wood for years and keep the material from drying out and becoming brittle over time.
You can also stain slabs to suit your taste and then apply several coats of polyurethane, varnish, or sealant for a high sheen. Several coats of sealant waterproof live edge countertops are designed for kitchens, baths, and other areas exposed to constant moisture.
Assemble Tools and Materials
Before beginning work on your DIY live edge project, assemble the following items:
- Raw live edge plank or round cut to size
- Safety glasses
- Carpenter’s pencil
- Metal screws with washers
- Belt sander
- Pneumatic or electric hand sander (preferably with dust catcher attachment)
- Circular saw
- 100-, 150- and 200-grit sandpaper
- Dust mask
- Electric router and bits
- Small can of epoxy
- Wood filler
- Several soft lint-free rags
- Wood stain
- 2-inch brush for stain
- Wood wax
- Wood sealant, polyurethane, or varnish
- Metal straight edge
- Metal speed square
- Power buffer
DIY Live Edge Coffee Table
A live edge coffee table makes a definitive design statement for a living room, den, or patio, and it’s a great project to begin your woodworking journey. You can start with a small rectangular slab or a circular tree stump cut crosswise to reveal a beautiful grain and live edge all around. Prep the wood by thoroughly cleaning the piece first. Remove cobwebs, moss, or dirt and check for insects.
Using a belt sander, go over the top and bottom surfaces of the piece until smooth. Use your router to smooth the organic edges and finish with a fine grit sandpaper. Go over the piece with a lint-free cloth and vacuum to remove excess dust particles. You may choose to apply a stain to the wood or rub oil into it for a natural finish. Several coats of stain or oil may be applied until you achieve a desired color or patina, just allow each coat to dry thoroughly before applying additional layers of stain or oil.
Turn your piece over and measure out where you want to place the table legs for the greatest stability and balance. Screw the legs in place and turn the table over to ensure it is level. Adjust and tighten screws, and voila! You have an art piece that will get rave reviews from family and friends for years to come.
DIY Live Edge Bench
Start with a plank long enough to seat one or two people. You may choose to keep a live edge on one or both sides of the piece, depending on how the bench will be used. If it’s going up against a wall, consider making a linear cut along one side. Your design may also call for attaching a backrest to the bench. For a one-of-a-kind design, consider using a live edge along the top of the backrest and the outer edge of the seat.
Once your slab has been cut to size, repeat the process for sanding and finishing, and attach sturdy wood legs to the bottom of the bench. Place the backrest right to the seat base and secure it with three to four metal brackets screwed into both pieces. Legs can be cut from stain-grade 2x4s, thick tree branches sanded stained to match the slab or store-bought metal. You might even add armrests to match the bench’s legs!
DIY Live Edge Bathroom Counter
A handcrafted wood bathroom counter is incredibly chic for any décor, but you’ll have to waterproof the piece if you want it to last. Start with a slab of wood wide enough to trim down to a standard 24 inches and the length of a double or single vanity.
You will also need to make a linear straight cut along one edge to fit the countertop along at least one wall. The remaining outer live edge should be sanded as smooth as possible to avoid splinters or rough spots. Once the slab is cut to its finished size, take a piece of paper, accurately measure and draw a circle for your vessel or drop-in sink.
The sink opening should line up with plumbing fixtures – usually centered on the countertop. Transfer your sink measurement to the wood slab and use your reciprocating saw to cut the opening into the slab. Follow the process of sanding and staining the countertop.
The next important step is waterproofing. Cover the entire surface with sealant using long brushstrokes along the wood grain to waterproof your live edge bathroom counter after sanding and removing dust. Be sure to wear a mask to prevent inhaling toxic fumes and work in a well-ventilated area, preferably outdoors. Allow the slab to dry for a full 24 hours before applying a second coat.
After another 24 hours, apply successive coats until your countertop is water- and stain-resistant. Mount your countertop using a metal bracket and screw system into the wall or on top of a vanity cabinet. Install the vessel or drop-in sink and secure water lines and drain underneath.
In addition to these projects, you can make a lot of unique interior objects. For example, I made a table that stands near my grill.
Enjoy the process
The beauty created by turning live edge wood slabs into one-of-a-kind bathroom countertops, benches, coffee tables, and accent pieces not only enhances any décor but offers unparalleled aesthetic appeal you will enjoy for decades. Besides this, the creation process is fascinating it can even become your new hobby.